Upload Video Content
Video Documentation Help
-
After successfully creating a course, navigate to** Video Courses** on the Instructor Dashboard in order to manage your video courses.
-
Find the course for which you have to add the content and click on Actions.

- Select Edit and press Add Sections & Subsections.

4. Scoping Your Course
For the learners to achieve their objectives, it is essential for you to break down your course into smaller units i.e. sections and subsections.
In order to add a Section, click on Add Section.
Note: To add all sections and subsections at once from your Google Drive, jump to section#8.

Add the** Section Name** and use the space provided below for more details. Once done, click on Create Section. You can edit the name of subsection by clicking on the pencil icon.
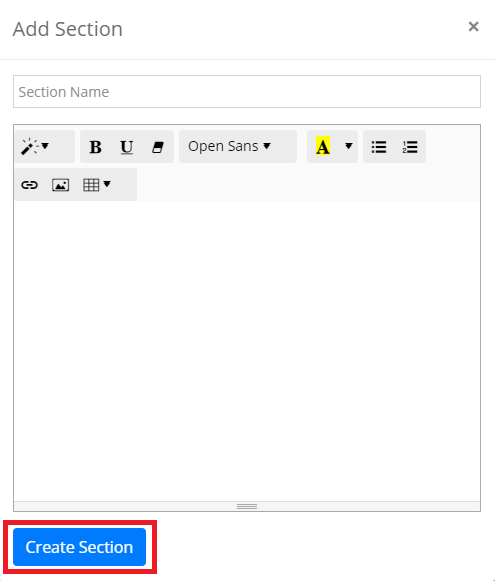
- You have successfully created a section. Once done, click on + to create Subsections in the given Section.
- There are two ways to Add Subsections. After providing the Title, you can either provide a YouTube Video, Vimeo or a Custom Video/Audio or File.
In the case of a YouTube Video or Vimeo Video, fill in the Link. Add notes if any.
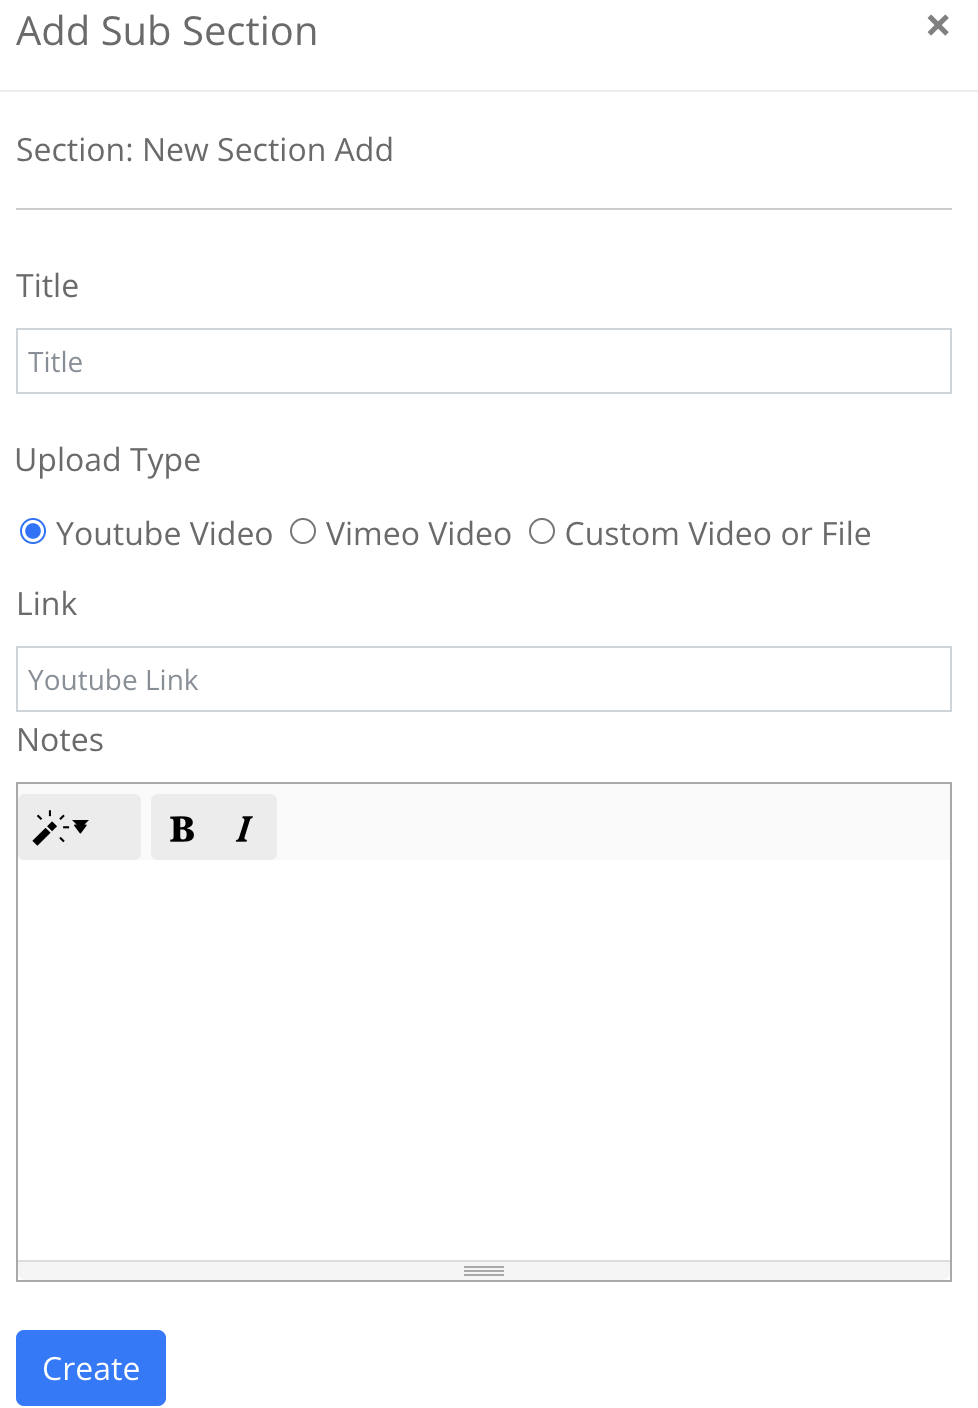
***Note:For Vimeo, please make sure you have the right access granted by logging into your Vimeo portal.
In the case of the Custom Video, upload a file from your system and drop it in the box as shown below. Add notes if any.
Extensions Allowed for Custom Video File Types: ogg, ogv, avi, mpeg, mov, wmv, flv, mp4, webm, mkv
Extensions Allowed for Document Types: pdf, doc3, docx, xls, xlsx, txt, jpeg, jpg, py, php, html, css, js, zip
Extensions Allowed for Audio File Types: mp3, ogg, wav, aac
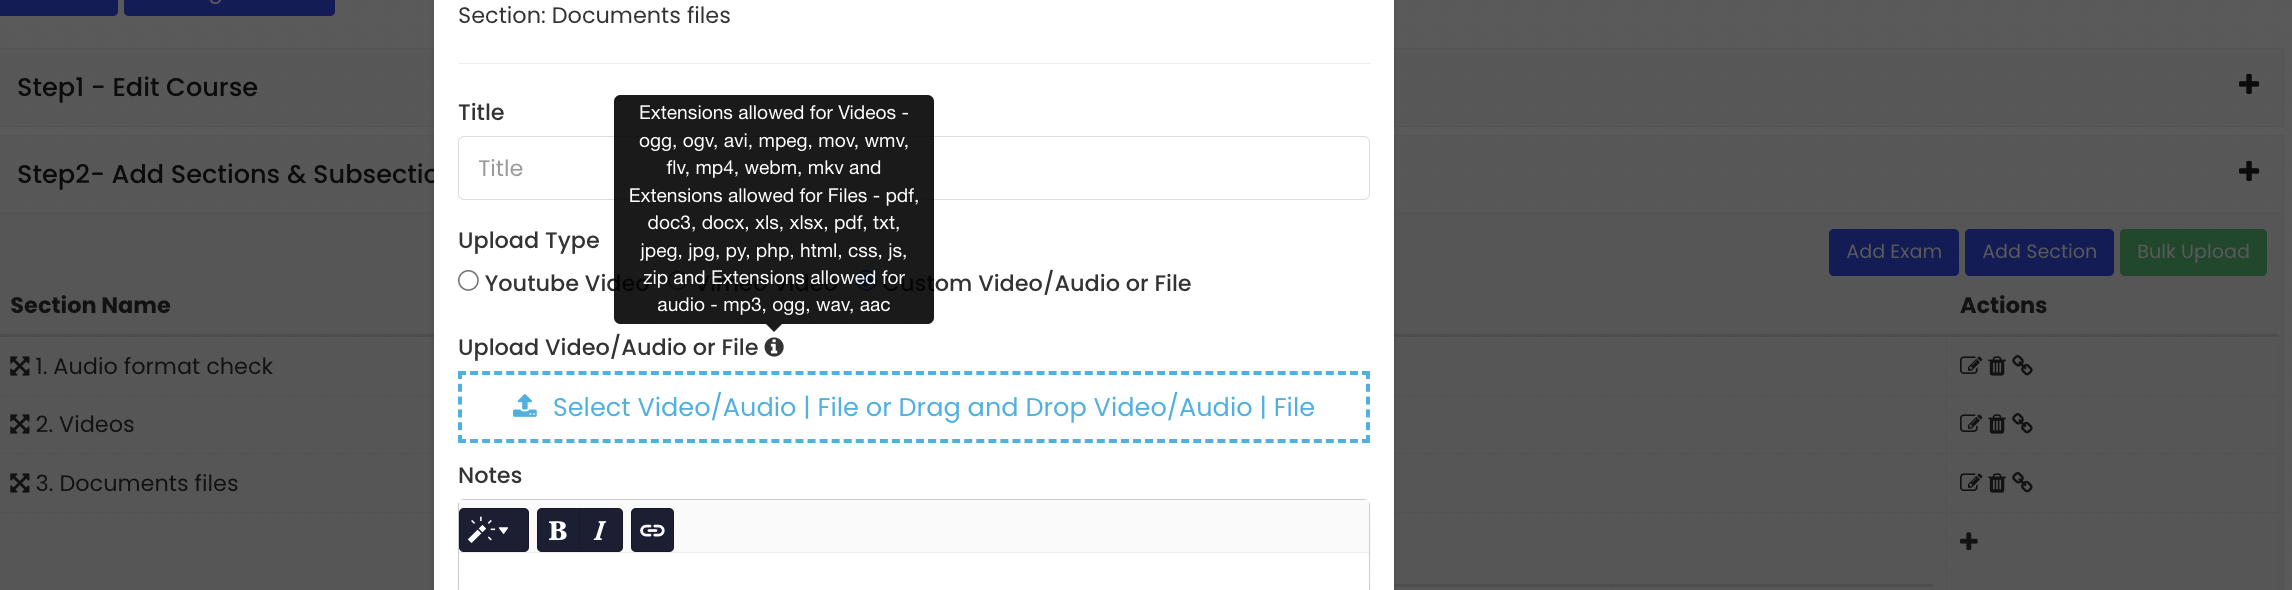
For certain document files, you have the ability to control whether users can download the files or view them within the browser. This is present in Create Video Course Section.
-
Once done, click on** Create**. You have successfully added a subsection.
-
You can upload all videos directly from your Google Drive only at one single go. Click on Bulk Upload and download the sample template from this link. The template format is shown below:
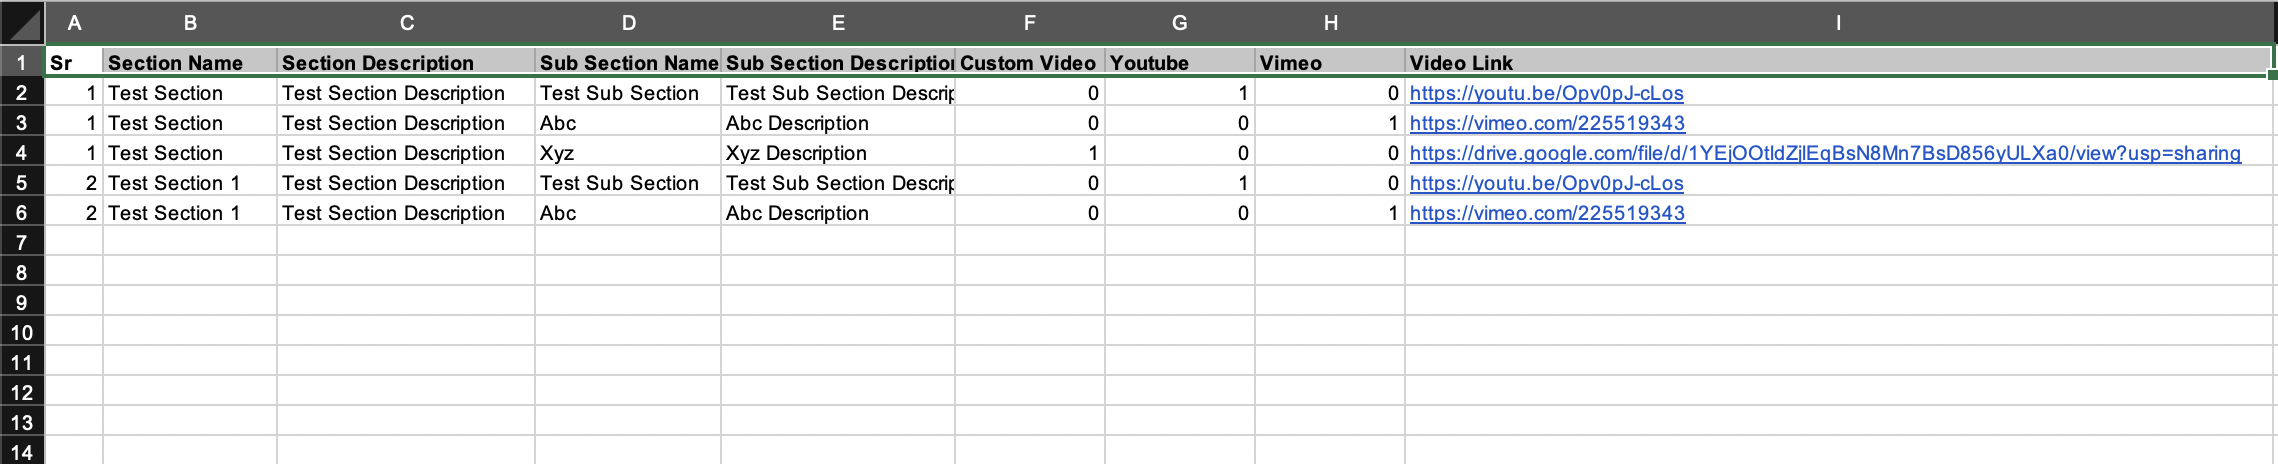
8.1 Column A (Sr) is supposed to indicate the Section Name. A section can have many subsections, which means column B can have same name repeated.
8.2 Based on if the video is Custom, YouTube or Vimeo, make sure the toggle/indicator is either 1 or 0.
1: Video type present
0: Video type not present.
As shown in the above example, row#2 has YouTube toggle/indicator as 1 in column G and a corresponding YouTube link in column I. Similarly in row#4, Custom Video has toggle/indicator as 1 in column G and a corresponding Google Drive link in column I.
*Note: For the custom video from Google Drive Link to work, please make sure the video access to given to view and sharing. *
8.3 Once you have filled the right details, click on the upload button after choosing the file from your computer:
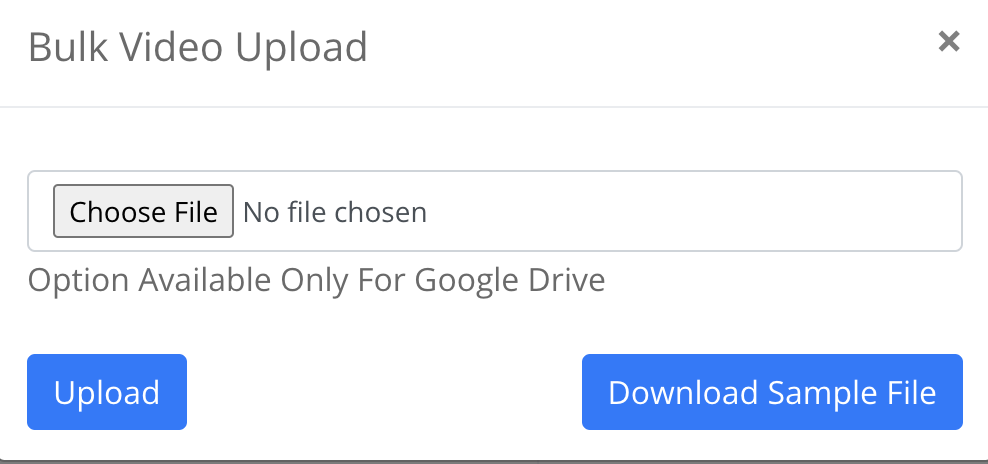
- Each custom video uploaded goes through a series of internal processing from ReviewNPrep before it becomes available for viewing. During this time, the status of the uploaded video would be in "Processing" state. This is needed to put a watermark to prevent it from Piracy. After the video has been processed and cleared from ReviewNPrep, it is available to be viewed as shown below:

- There are other icons as shown below that perform a specific function as described below
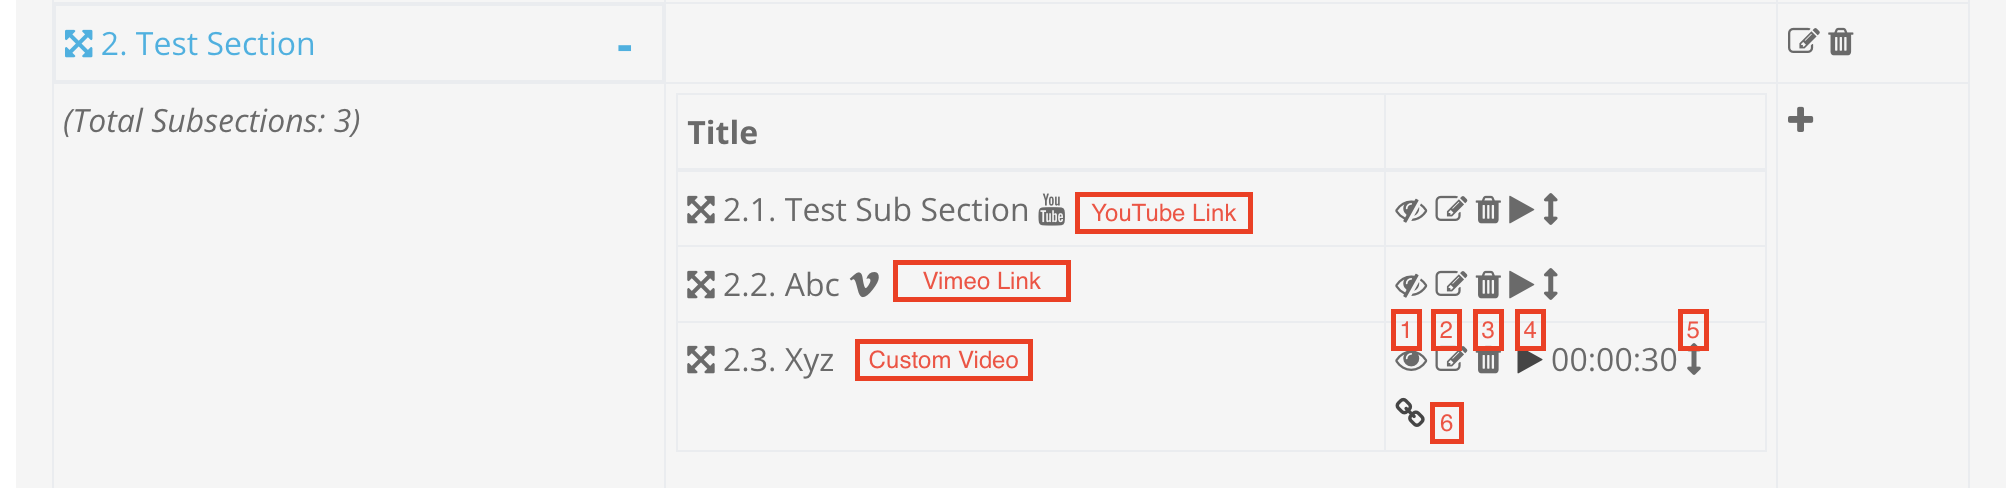
With each video, there are multiple buttons/icons as shown above.
(1) Button1 [Mark video for Preview. Preview videos are not locked and available as demo to students on course details page]
(2) Button2 [Edit the subsection]
(3) Button3 [Delete the subsection]
(4) Button4 [Play the video]
(5) Button5 [Move the video to a different section]
(6) Button6 [Share the Video]
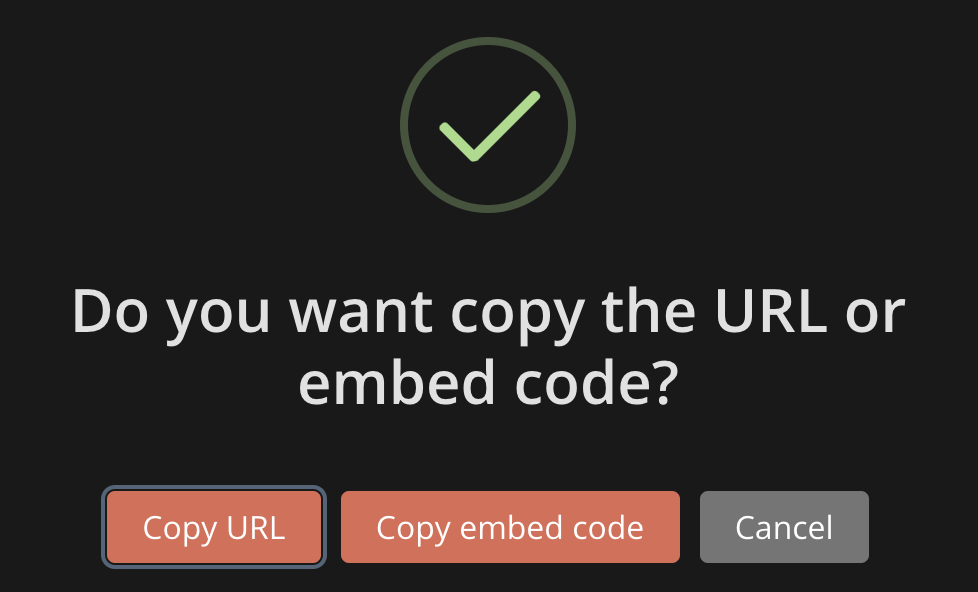
Similar to Vimeo, you can share a video uploaded on RNP to other sites. You can either copy the URL and share the link directly or Copy the embed code and insert it in your website. This is a great way to include videos from your course to your own personal website. **
**
Note***:****For the above option to work, the video should be marked as public (button 1). *
-
Follow the same procedure to add more subsections.
-
Upon adding all the Sections and Subsections, if you wish to add practice exams to support your video content, click on Add Exam. There are two ways to add the practice exams.
13. Populating Your Course
While drafting a practice exam, keep the needs of all possible learners in mind. We recommend a thorough practice exam that boosts engagement.
(a) Add New Exam
You can add a new exam by following the procedure mentioned in "Add Practice Exam Questions".
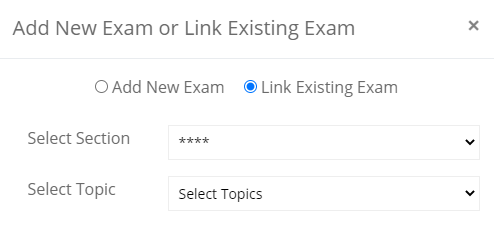
(b) Link Existing Exam
You can link an existing exam on Marketplace by selecting a respective Section and picking a Topic from the drop-down menu.**
**
Bulk Upload
Video Documentation
Bulk Upload works if you want to upload multiple videos at a time stored in your Google Drive, or use YouTube and Vimeo videos. Download the template from the Bulk Upload option and fill the document as needed, before uploading the file again.
Once uploaded, wait for the success message.