Page Builder (Old V1.0) Detailed Explanation
If you want to create everything from the scratch, you can use the main widgets that are listed under Media, Typography, Basic, Layout, Components, and Extra.
Our recommendation is to use the above listed widgets if you are technical and have some basic html/css background. Read on for using the pre-made blocks/widgets.
To make things easy for non-technical users, we've created multiple blocks/widgets that are drag and drop and can be used within your pages. Click on the top right icon to browse through the widgets
Below are some of the important widgets that you'd see on the page builder:
- Courses: When you add this widget, it would list all your enabled courses.
NOTE: You'd have to save the changes and refresh before you can see the actual details
Check out this video that explains the Courses widget.
-
FAQ: If you are selling a service or a product, this widget can be used to address most commonly asked questions.
-
Pricing: An easy to use widget for displaying pricing options if you are selling any product.
-
Testimonials: An important widget to establish trust with the end-users.
-
Subscribe: This widget presents a form for the user that they can fill in. All details filled will be available in your backend admin module.
For complete list, check out the page builder in your profile.
How to create complex pages from the scratch?
If you are non-technical and do not have understanding of html and css, use the templates provided in the widgets section. Scroll to the bottom and drag/drop the entire template.
Once you have done this, you can add or remove the individual sections as needed.
Alternatively, you can add custom html/css code using the import button. Check this link for importing your custom pages.
How to add links?
There are a couple of ways to add links to the text:
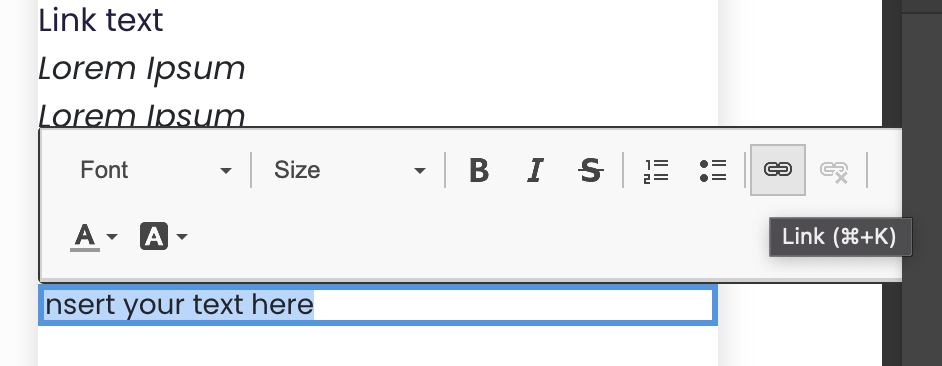
- If you are using any of the Typography widgets (Text, Header, Paragraph), you can select the text which opens a dialog box to add a link as shown below:
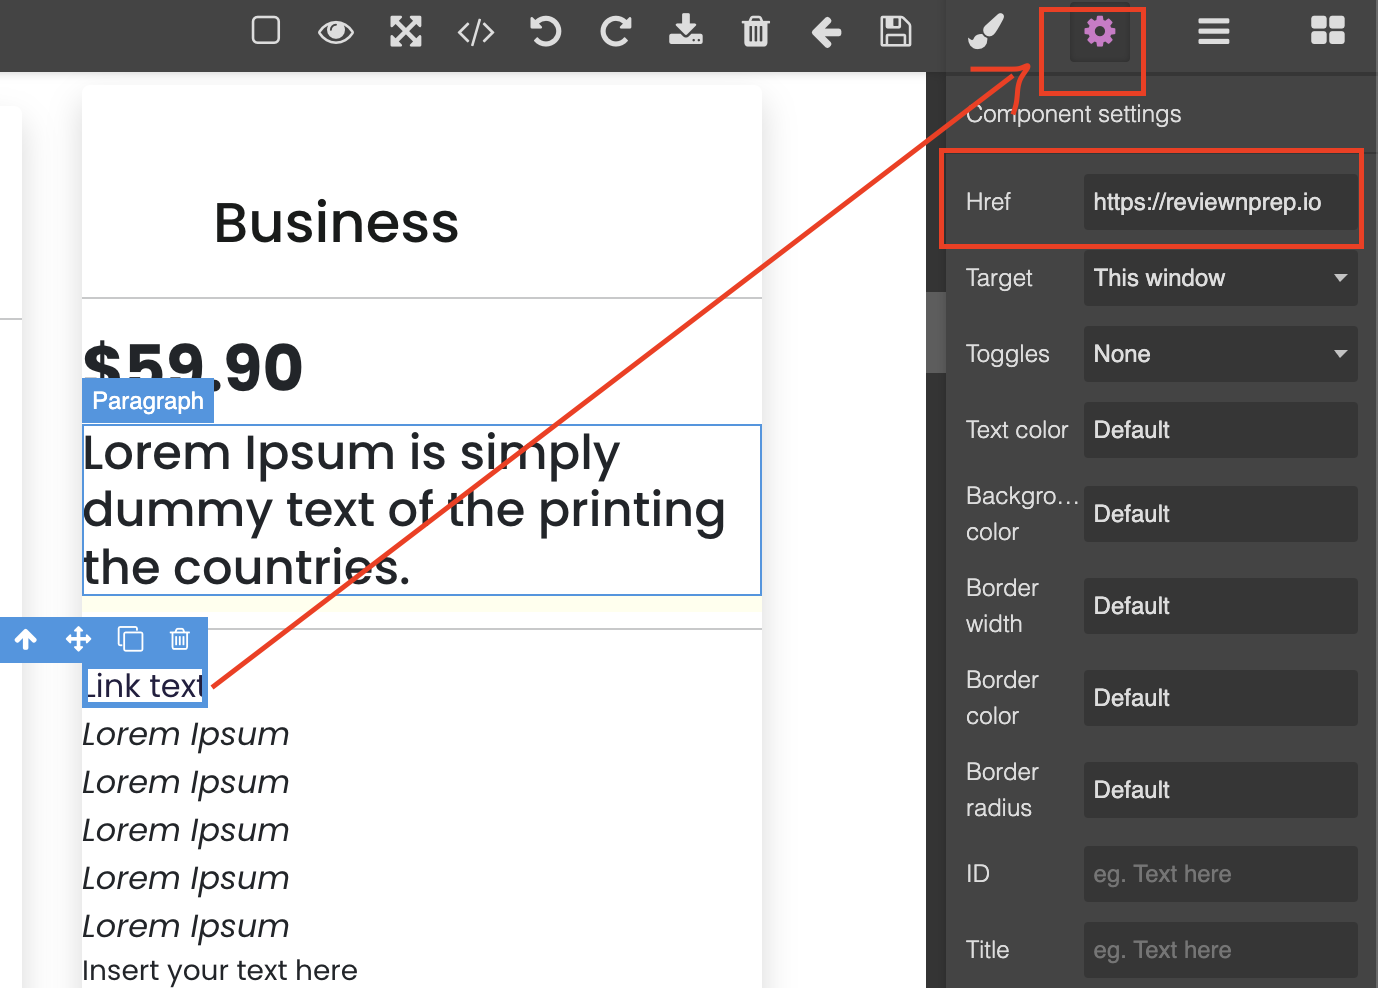
- Alternatively, the Link widget under Basic widgets can be dragged and dropped in the canvas. Click on the settings icon and enter the required link in the href tag as shown below.
How to add images?
Under Media widgets, drag and drop the image icon in the canvas. Double click on the image 800X500, which will open a dialog box as shown below.
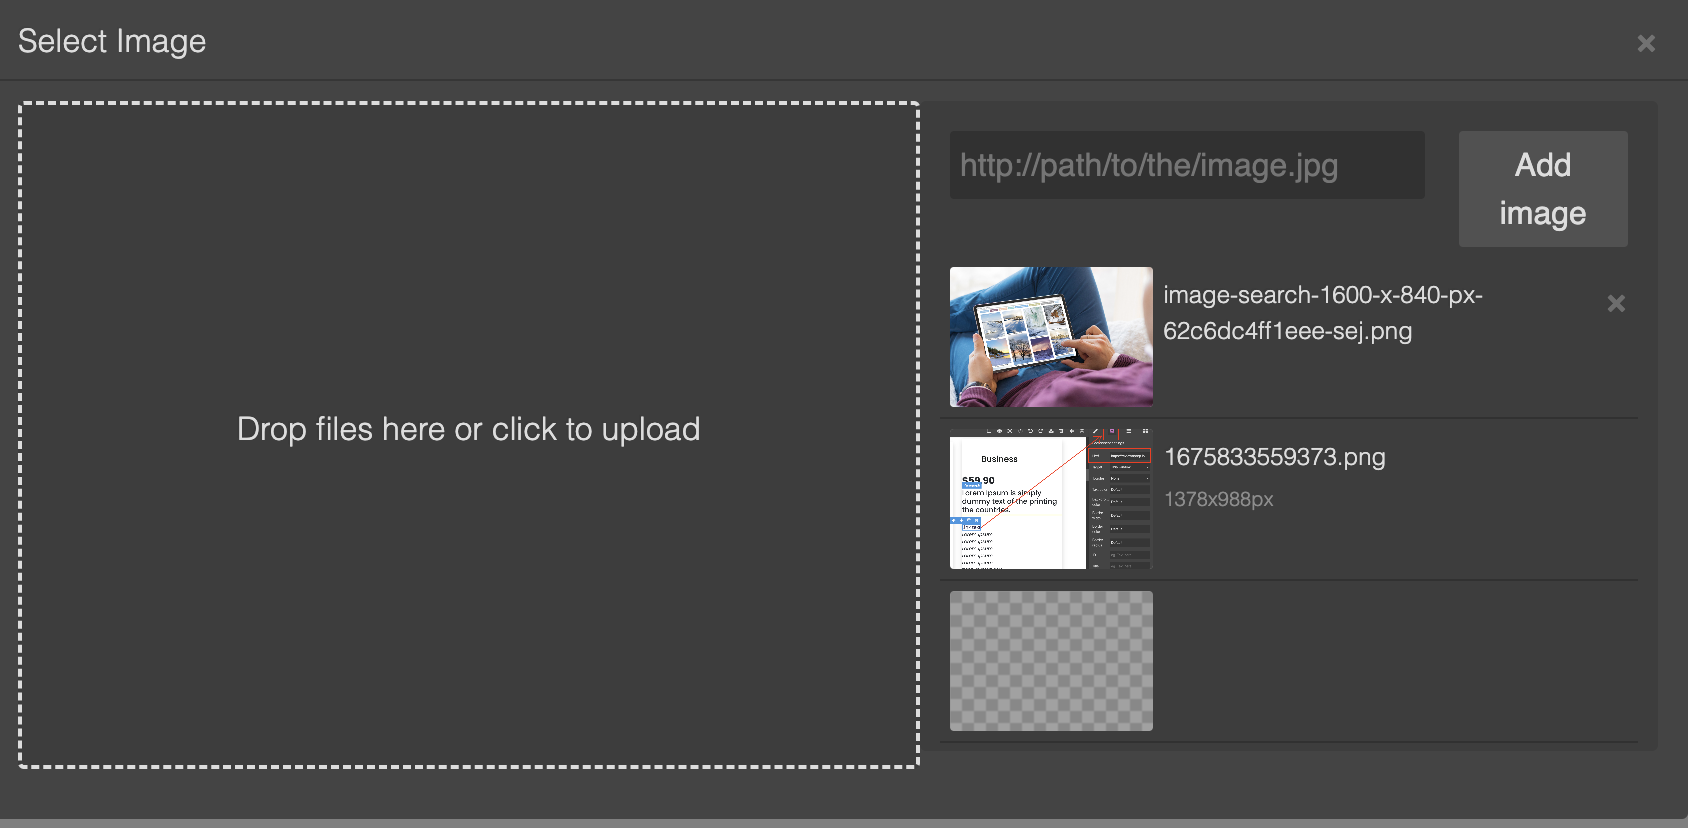
You have 2 options to choose - either get an image hosted online with an exact path for the image or upload if from your local machine, using drag and drop into the image section.
Regardless of the method selected, you then need to select/highlight the image to be inserted into the canvas. The image uploaded and can resized by holding any edge and dragging it in or out based on your needs.
How to use tags widgets?
In order to save time designing complex pages and showing your courses, you can use the widgets for courses. One popular widget is "tags", found under Courses.
To use this, you need to have a page created, click on build page. Click on the widgets on top right corner. Scroll down to courses and drag drop any of the tags widgets (Practice Exams, Video Courses, Flashcards, and all content).
Hit the save button and do a refresh for the content to load.
Check out this link on how to use the widget in detail:
How to resize the canvas?
Based on your screen resolution, sometimes the templates are not fully shown on your screen and the content might appear hidden. You can resize your browser (Chrome, Edge, Firefox etc) screen by Zoom in or out.
Alternatively if you are using windows you can use shortcuts ctrl and - sign to zoom out; ctrl and + to zoom in. If you are using Apple, you can use Command and - sign to zoom out; command and + to zoom in.