Create Video Course Topic
Video Documentation Link
- To create a video course, navigate to Video Courses on your Instructor Dashboard and click on Create New.
2.** Planning Your Course**
The foremost step in online learning is accommodating your knowledge and presentation skills in the best manner possible.
- The delivery of your course is completely subjective. We recommend a thorough prep on the flow of the video course before recording the same.
- The course content must be designed in a way that it takes into account the learners' foundational level knowledge.
- Start by adding the following:
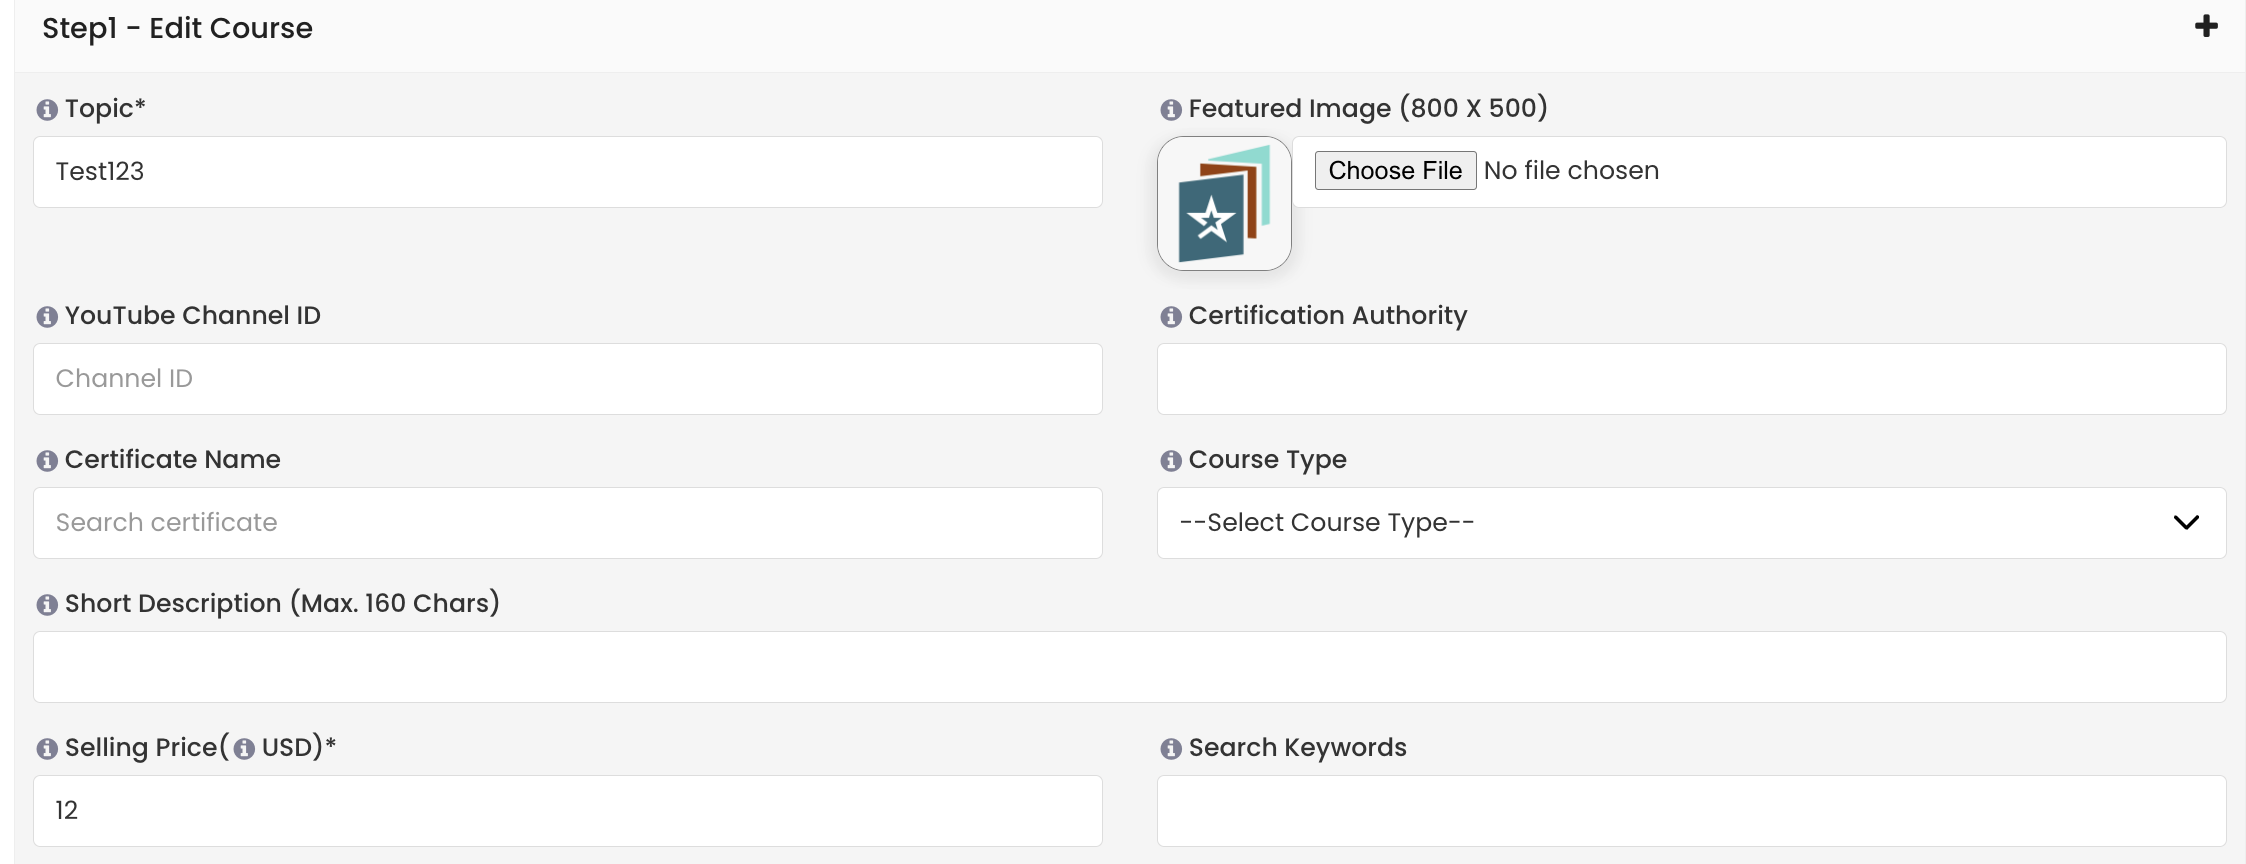
(a) Topic [Name that will appear when the course is searched]
(b) Featured Image [It should describe the course accurately with a size under 500 KB]
(c) YouTube Channel ID [Valid Channel ID] See details here.
(d) Certification Authority [Pick one from the drop-down menu/ Add on your own]
(e) Certification Name [Pick one from the drop-down menu/ Add on your own]
(e) Course Type [Pick one from the drop-down menu/ Contact us if you don't see your option]
(f) Short Description [Maximum 160 words]
(g) Selling Price ($) [Set your own selling price (Our recommendation: minimum $9.99 for a video course)]
(h) Search Keywords [Multiple keywords can be added separated by commas]
4.** Structuring Your Course**
This is where you optimally organize the course content. In order to set your course apart, strategize your course in a way that the learners can utilize it to the best of their capabilities.
(a) Course Description [Detailed version of the course]
(b)** Level **[Choose from Beginner/ Intermediate/ Expert/ All Levels]
(c) Learning Objective [Certification details offered by the Certification Authority]
(d) Welcome Email to Student [It is sent to the buyer upon purchasing your course]
5.** Custom Options for Listings and Students**
For Video Course, we have few custom options for listings and how students see the course on their end:

-
Enable Q&A/Forums - This option is shown to the students for interacting with instructors. All forums are by default open and comments/questions visible to everyone. Checking this would enable the interactive forums. Instructors can see all questions, forums discussions in their admin panel. The option in the navigation menu is Student Interaction followed by Content Queries
-
**Enable Rating **Listing - It is advisable to check this menu option as ratings and user feedback give students more confidence that the course is good and worth buying.
-
Enable Duration Listing - This checkbox comes in handy when we have Vimeo or YouTube videos. The platform doesn't read the time for those videos and it is advisable to either remove the duration listing if you have Vimeo or YouTube videos. Alternative is to override duration and give the duration in minutes.
-
Access Document As - If your course has text documents like doc, docx, .txt, pdf etc, our html viewer can show it on screen, without the need of downloading it. In other words, students can look at the documents, without downloading it if you select View. Should you want the students to download the document, you can enable the download button.
-
Take your time to fill in all the details. Once done, click on Create Course.
You have successfully created a course.
NOTE: If you want to copy the course landing page, you can go to the main course listing page and under actions, click Copy. This will duplicate the course landing page only and not the content.